Controlling LEGO Wedo Motor with Python GUI App in Linux
LEGO Wedo 2.0 is a good start for learning robotics. I created a simple GUI app controlling the LEGO motor using Python. In this article, I will share my experience in how to select the development environment and how to build the Python app.
Learning Resources
When I searched for `LEGO Wedo Python’ in Google, I found two informative articles: Controlling a WeDo 2.0 motor and WeDo 2.0 – reverse engineering. Both of them mentioned pygattlib, which is a Python library (Linux only) to use the GATT Protocol for BLE (Bluetooth Low Energy) devices. The smart hub included in LEGO Wedo 2.0 is a BLE device.
Command Line Tools and The Development Environment
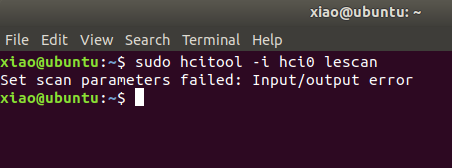
Before writing code, we can use hcitool and gatttool to scan the Bluetooth device and test the connection.
Get the BLE address and device name:
sudo hcitool -i hci0 lescan
LE Scan ...
98:07:2D:DD:98:56 (unknown)
98:07:2D:DD:98:56 LPF2 Smart Hub
Connect to the device:
gatttool -I
[                 ][LE]> connect <ble address>
Can I use Windows Subsystem for Linux(WSL) for development?
No. You will get the following error message:
Invalid device: Address family not supported by protocol
Can I use Linux in VMWare Workstation for development?
No. You will fail to run hcitool in VMWare virtual machine.
According to the answer from StackOverflow, VMWare does not support BLE in Linux guests.
Building a Simple Python GUI App to Control LEGO Wedo Motor on Raspberry Pi
I finally decided to build the Python app on Raspberry Pi because I don’t have a Linux PC.
Install dependent libraries and gattlib:
sudo apt-get update
sudo apt-get install libbluetooth-dev bluez bluez-hcidump libboost-python-dev libboost-thread-dev libglib2.0-dev
sudo pip install gattlib
Create the UI Window that includes a label and some buttons:
import Tkinter as tk
from gattlib import DiscoveryService
from gattlib import GATTRequester
from time import sleep

def run():
    global button_run
    button_run.after(DELAY, motor_run)

def stop():
    global button_stop
    button_stop.after(DELAY, motor_stop)

def connect():
    global button_disconnect
    button_disconnect.after(DELAY, smart_hub_connect)

def disconnect():
    global button_disconnect
    button_disconnect.after(DELAY, smart_hub_disconnect)

def up():
    global button_up
    button_up.after(DELAY, motor_up)

def down():
    global button_down
    button_down.after(DELAY, motor_down)

root = tk.Tk()
root.title("Lego Wedo 2.0 Motor Control")

label = tk.Label(root, fg="dark green", text='N/A')
label.pack()

button_connect = tk.Button(root, text='Connect Smart Hub', width=BUTTON_WIDTH, command=connect)
button_connect.pack()

button_disconnect = tk.Button(root, text='Disconnect Smart Hub', width=BUTTON_WIDTH, command=disconnect, state='disabled')
button_disconnect.pack()

button_run = tk.Button(root, text='Run motor', width=BUTTON_WIDTH, command=run, state='disabled')
button_run.pack()

button_up = tk.Button(root, text='Speed up', width=BUTTON_WIDTH, command=up, state='disabled')
button_up.pack()

button_down = tk.Button(root, text='Speed down', width=BUTTON_WIDTH, command=down, state='disabled')
button_down.pack()

button_stop = tk.Button(root, text='Stop motor', width=BUTTON_WIDTH, command=stop, state='disabled')
button_stop.pack()

root.mainloop()
When press the connect button, use DiscoveryService to get all available devices and use GATTRequester to connect the device. My device name contains `Smart Hub’:
def smart_hub_connect():
    service = DiscoveryService("hci0")
    devices = service.discover(2)

    for address, name in devices.items():
        if name != '' and 'Smart Hub' in name:
            label['text'] = address

            global button_run, button_stop, button_disconnect, req
            button_connect['state'] = 'disabled'
            button_run['state'] = 'normal'
            button_stop['state'] = 'normal'
            button_disconnect['state'] = 'normal'
            button_up['state'] = 'normal'
            button_down['state'] = 'normal'

            req = GATTRequester(address, True, "hci0")
            break
To run the motor, we just need to send a sequence of 4 bytes to a specific handler:
def motor_run():
    global req
    if req != None:
        req.write_by_handle(0x3d, str(bytearray([0x01, 0x01, 0x01, 0x64]))
)
The first byte represents the port. The value is 01 or 02.
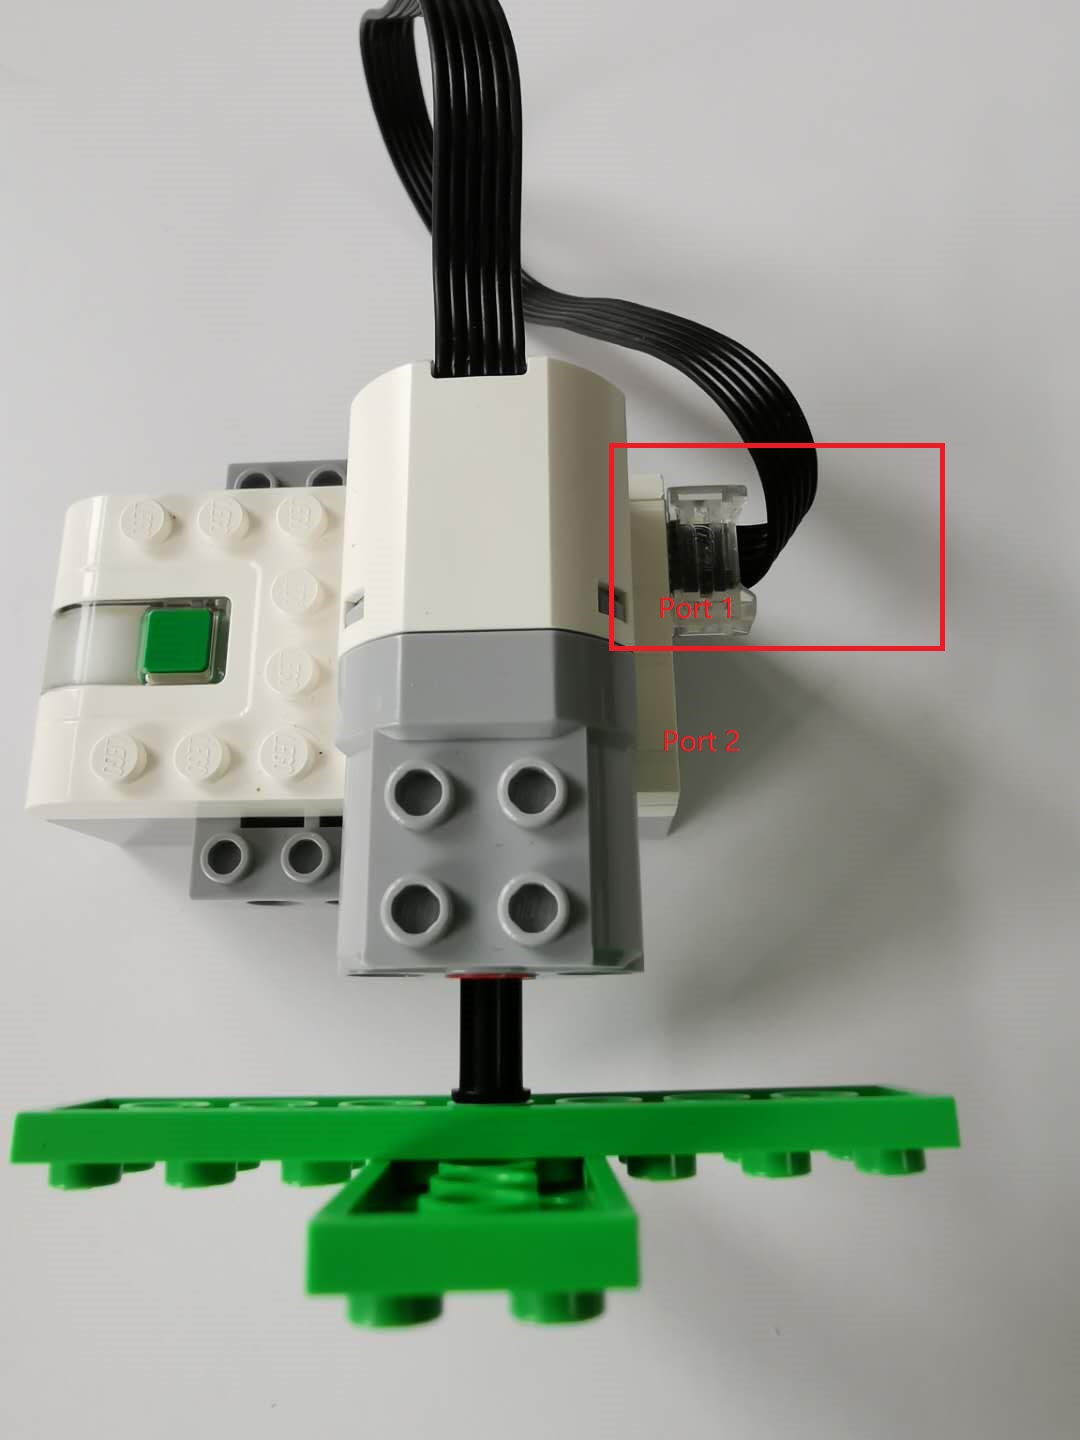
Change the hardware port to see what will happen via gatttool:
[98:07:2D:DD:98:56][LE]> char-read-hnd 0015
Characteristic value/descriptor: 01 01 00 01 01 00 00 00 01 00 00 00
[98:07:2D:DD:98:56][LE]> char-read-hnd 0015
Characteristic value/descriptor: 02 01 01 01 01 00 00 00 01 00 00 00
The last byte defines the motor speed. Here is the code for adjusting the speed:
MAX_SPEED = 100
MIN_SPEED = 1
SPEED_CHANGE = 4

current_speed = 100
req = None

def motor_up():
    global req, current_speed
    if req != None:
        if current_speed == MAX_SPEED:
            return

        current_speed += SPEED_CHANGE
        req.write_by_handle(HANDLE, str(bytearray([0x01, 0x01, 0x01, current_speed])))
        sleep(WEDO_DELAY)

def motor_down():
    global req, current_speed
    if req != None:
        if current_speed == MIN_SPEED:
            return

        current_speed -= SPEED_CHANGE
        req.write_by_handle(HANDLE, str(bytearray([0x01, 0x01, 0x01, current_speed])))
        sleep(WEDO_DELAY)
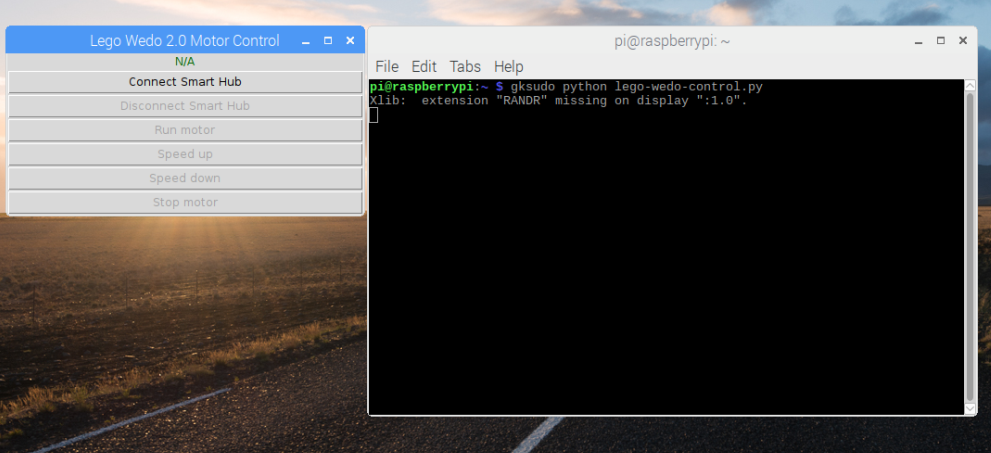
You will fail to run the app if you don’t have a root privilege:
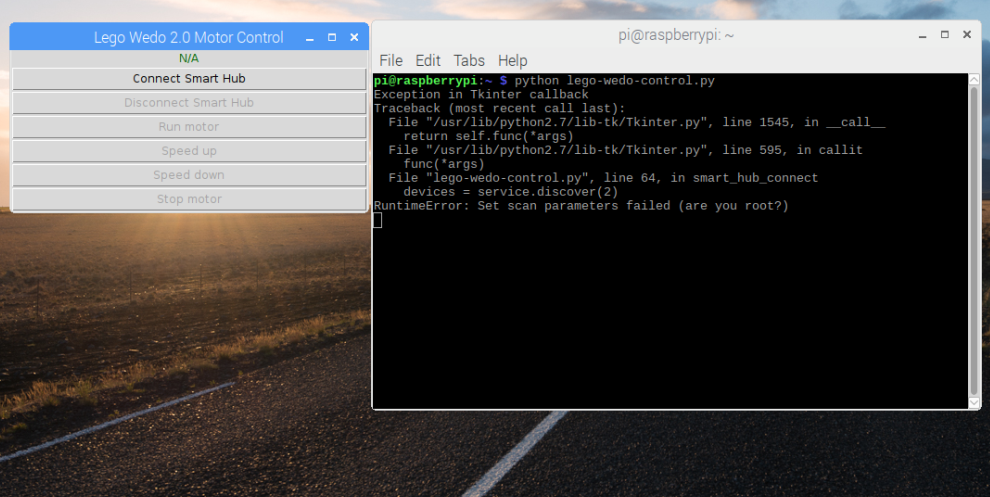
Should you run the app with sudo'? No, you have to run the app with gksudo’:
gksudo python app.py
In Windows, we can use SmarTTY to display GUI for the remote Linux app.